Detection Rules
RoleAdministratorRead20 min
Screen
Detection Rules
/management/detection-rulesDefine which threats matter to your organization. A rule is a Presto SQL query that Affinity evaluates on an interval; when there are matches, it raises an alert and notifies you on the channel you choose.
What it's for
Create, test, and manage rules that generate automatic alerts from SQL queries. This page covers the list, the 5-step creation wizard, and editing.
Before you start
- You need admin permissions on
/management/detection-rules. - Have your detection SQL ready (you can build it in Logs and use Create Detection Rule).
- For the rule to notify, first create a notification channel (Slack, Discord, etc.).
Expected result
- The rule appears in the Detection Rules list with its type, severity, and status.
- After the evaluation interval, matches generate alerts in ALERTS and notify the associated channel.
Tips
- The Detection Query uses the same Presto SQL as Logs: test it there first and bring it over with Create Detection Rule.
- Use Test Query in step 5 (Review & Test) before creating the rule to confirm the SQL returns what you expect.
- To save, the query must be
SELECT … FROM … WHERE …with no extra clauses. The engine appends time filters automatically. - Severities:
Low,Medium,High,Critical. Rule Type and MITRE ATT&CK are configured when editing the rule, not at creation.
The Detection Rules list
- Summary cards on top: Total Rules, Active Rules, Custom Rules, Critical Rules, High Severity.
- Search: by name, ID, or description (type and Search; Clear to reset).
- Filters: Severity (All/Critical/High/Medium/Low), Status (All/Enabled/Disabled), Type (All/Custom/Built-in).
- Columns (configurable):
Rule Name,Type,Severity,Status,MITRE Techniques,Lookback,Actions. Export downloads the filtered rules as JSON. - Each row has a switch to enable/disable the rule instantly.

Create a rule — 5-step wizard (Add Rule)
- Add Rule opens the Add Detection Rule dialog (
Step {N} of 5, with Back / Next). Steps are: Detection Logic → Rule Management → Basic Info → Details → Review & Test. Each step validates its required fields (marked with *) before letting you continue.
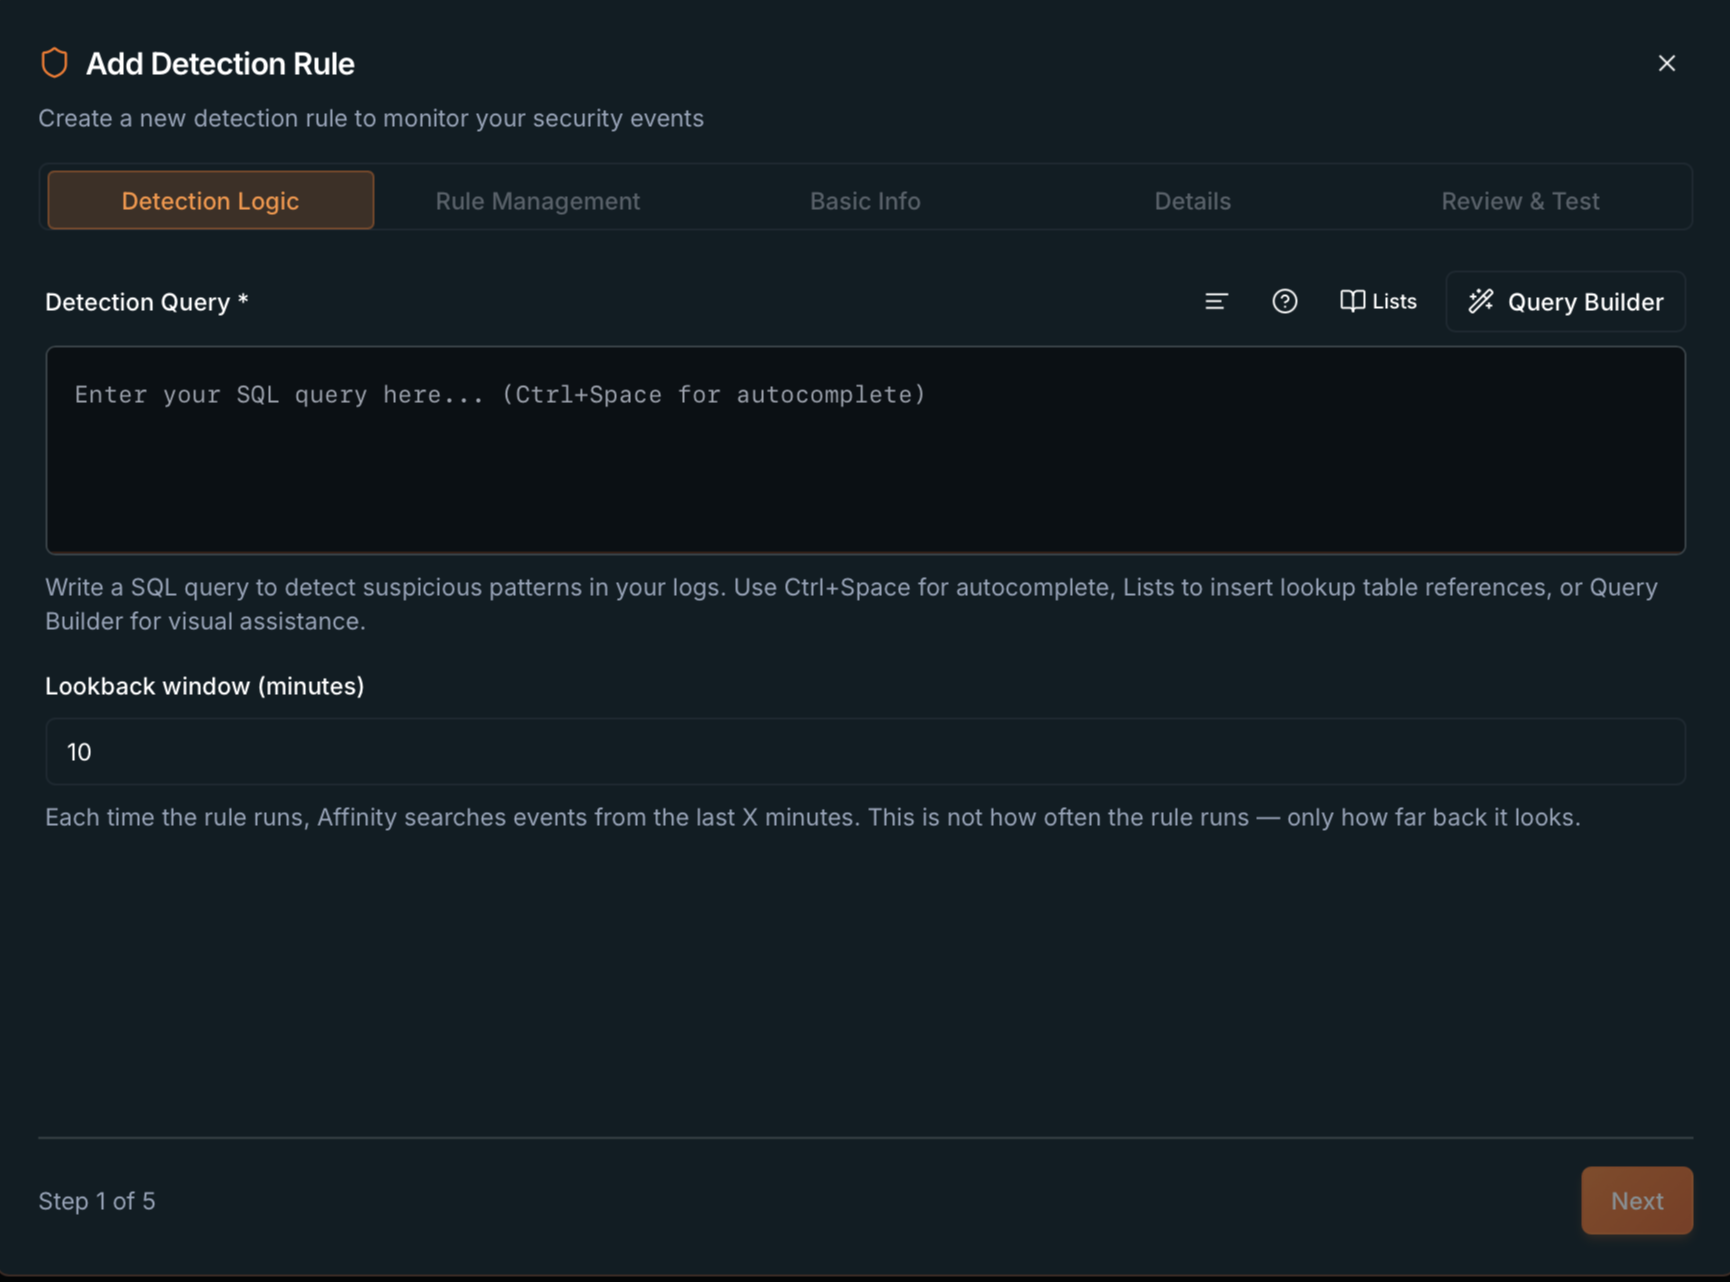
Step 1 · Detection Logic
- Detection Query * — the Presto SQL that defines the detection (required). Must be
SELECT … FROM … WHERE …only: the engine appends time and source filters automatically. Before saving, removeORDER BY,LIMIT,OFFSET,GROUP BY, andHAVING(you can test queries with those clauses in step 5, but they cannot be saved). - Editor tools: Format SQL, SQL Help, Lists (insert
{{table_name}}references to lookup tables from Management → Lookup Tables) and Query Builder. Shortcut:Ctrl+Spaceto autocomplete. - With Lists, use Reference ✦ recommended mode so the rule stays in sync when you update the list (see Lookup Tables).
- If you come from Logs, a Query Preloaded banner appears with the query already filled in.
- Lookback window (minutes) — how many minutes back each rule run searches for events. Default
10; must be greater than0. This is not how often the rule runs — only the event window it evaluates.
Step 2 · Rule Management
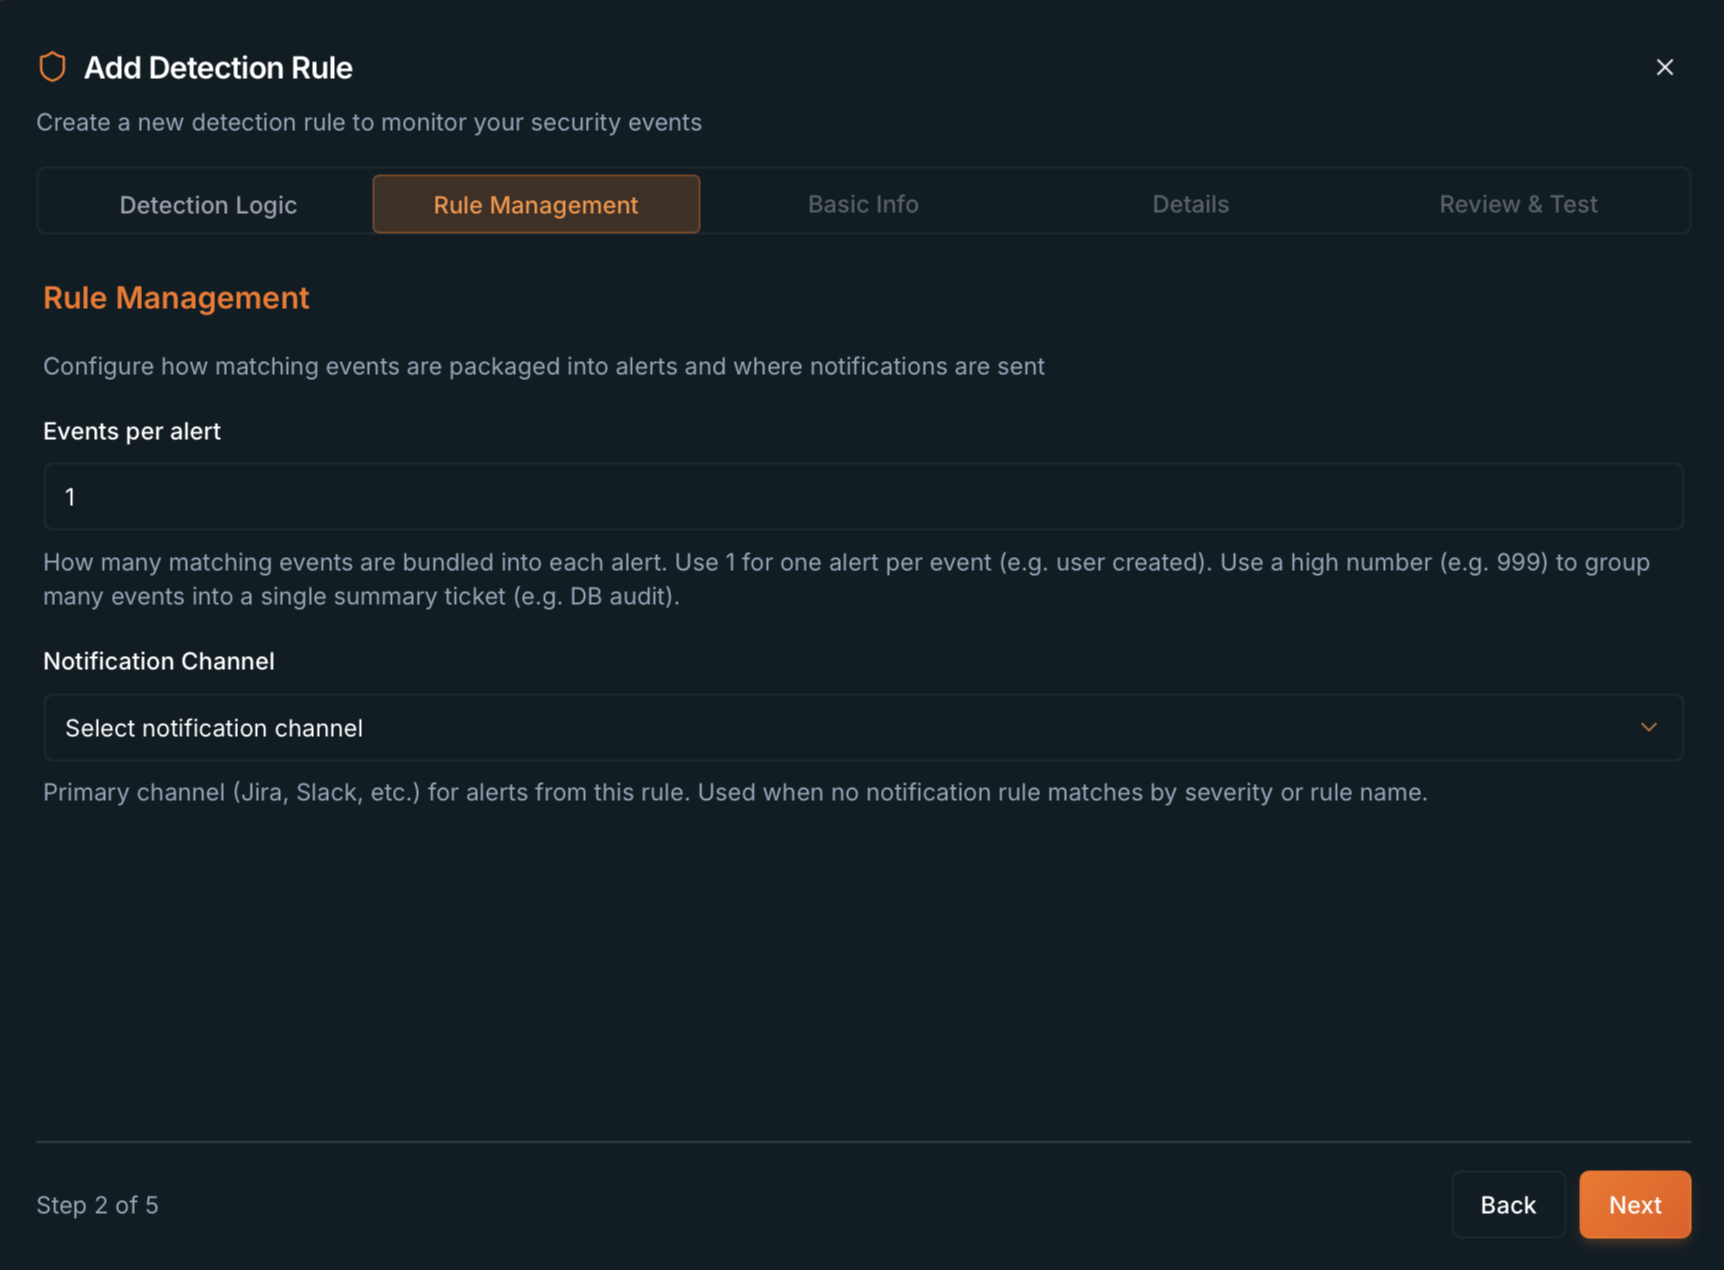
- Configure how matching events are packaged into alerts and where notifications are sent.
- Events per alert — how many matching events are bundled into each alert. Default
1; must be at least1. Use1for one alert per event; a high value (e.g.999) groups many events into a single summary ticket. - Notification Channel — optional at creation. Only enabled channels appear (shown as
name (type)). Fallback when no Notification Rule matches (by severity or detection rule). See Notifications.
Step 3 · Basic Info
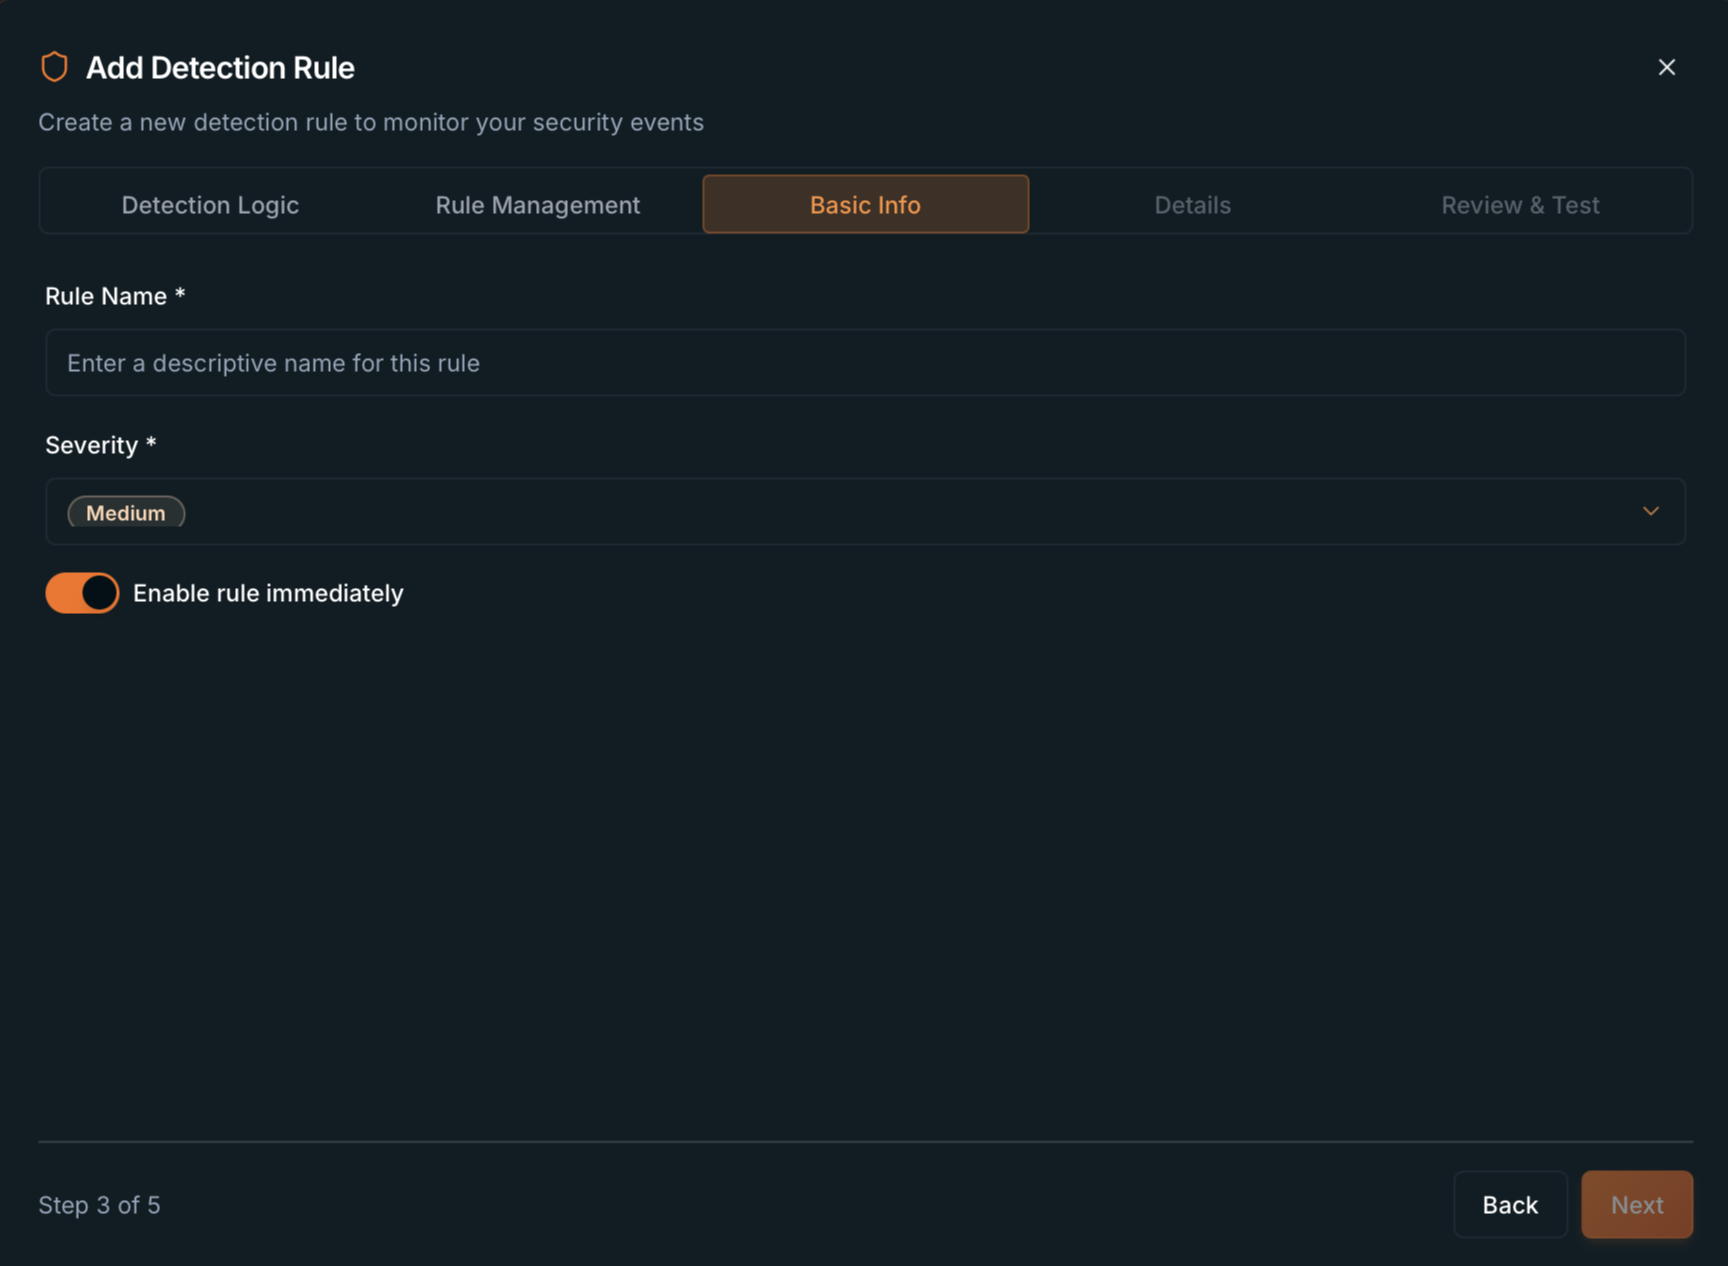
- Rule Name * — a descriptive name for the rule (required).
- Severity * —
Low,Medium,High, orCritical. DefaultMedium. - Enable rule immediately — switch to activate the rule as soon as it's created (on by default).
- On create, the rule is saved as type Behavioral (Custom).
Step 4 · Details
- Description * — what the rule detects and why it matters (required).
- Resolution Steps * — recommended actions when the rule triggers (required).
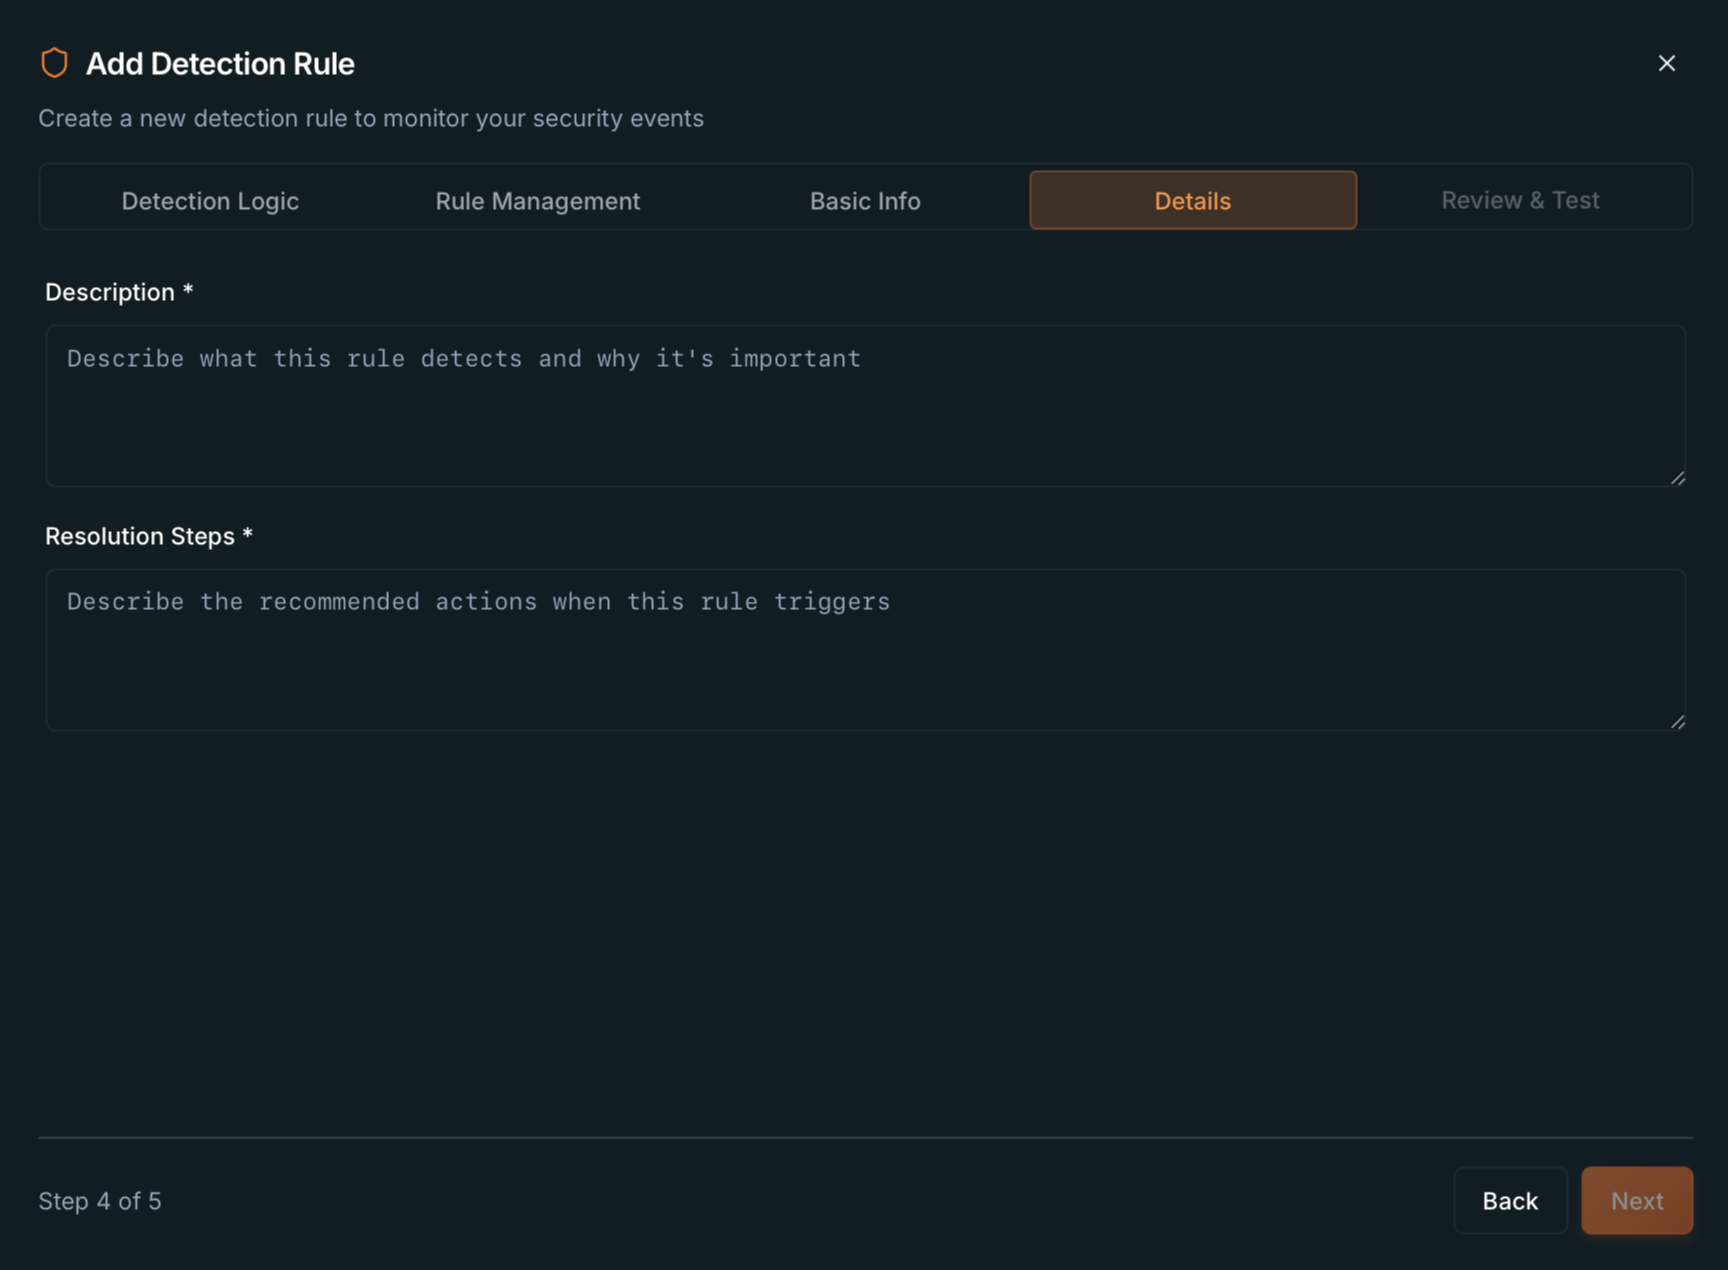
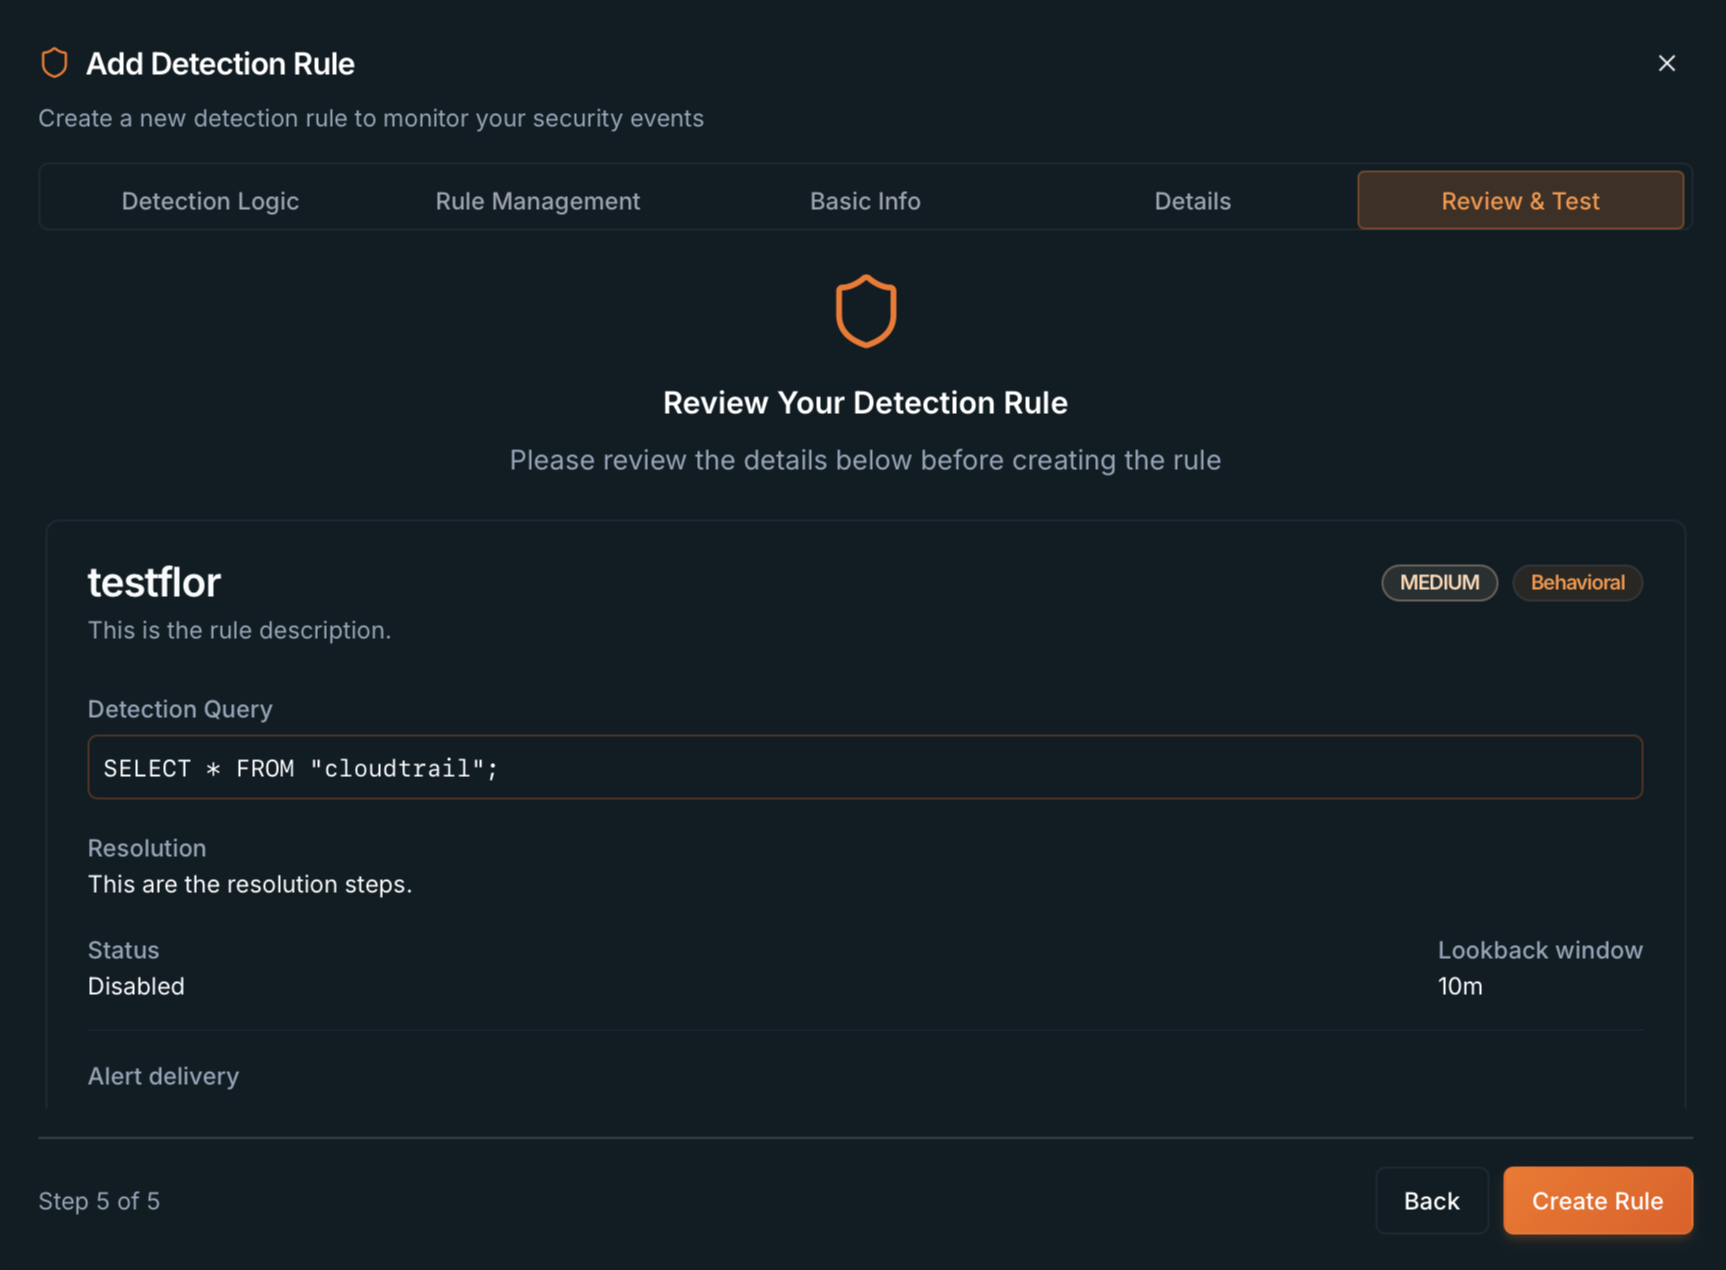
Step 5 · Review & Test
- Final summary: name, severity, type (Behavioral), query, resolution, status, Lookback window, and Alert delivery (Events per alert and Notification Channel).
- Test Query — runs the SQL using the same lookback window as production and shows up to 10 matching records (or a message if there is no recent activity, which is normal). You can test queries that still contain forbidden clauses; to save, the query must be clean (
SELECT … FROM … WHERE …). - Confirm with Create Rule (shows Creating... while it processes). If the query is not valid for saving, an amber warning appears.
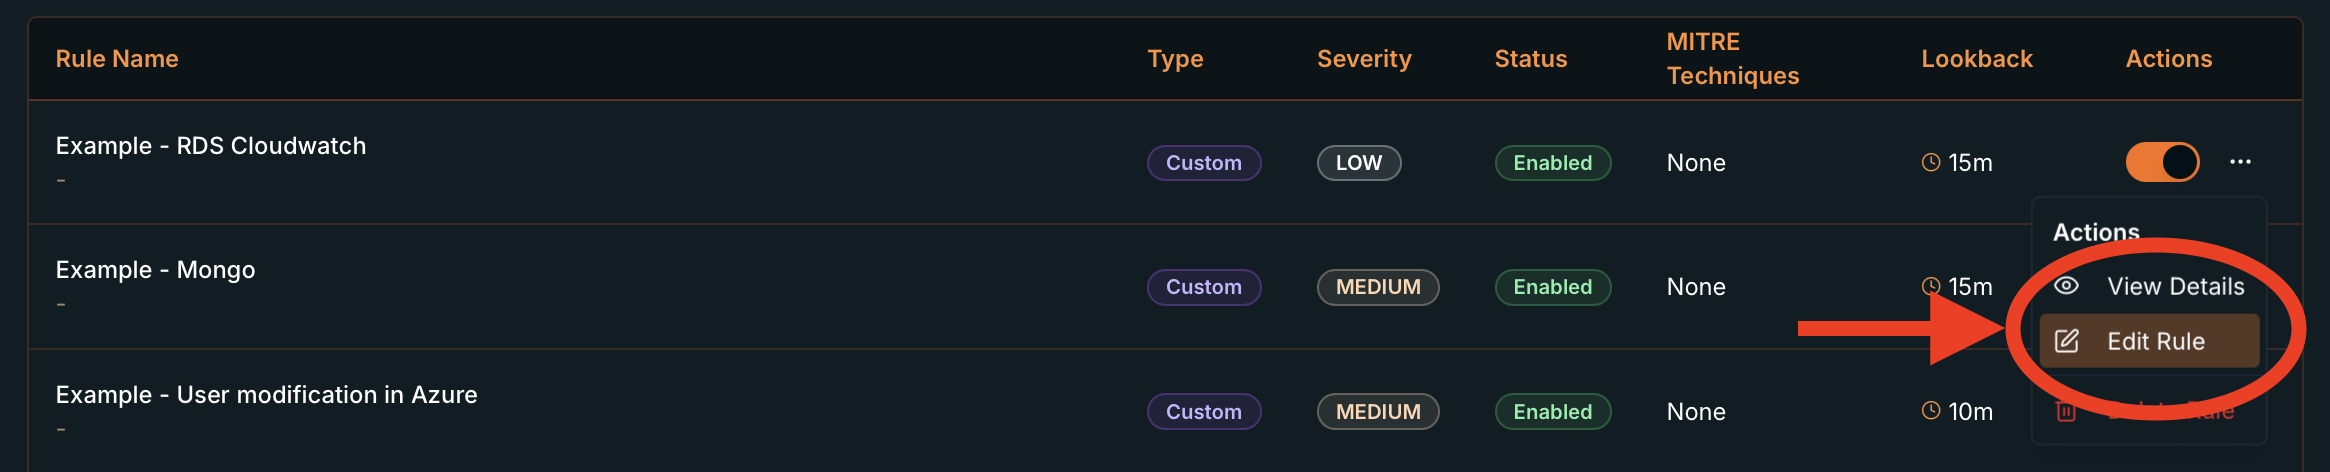
Edit a rule (Edit Detection Rule)
- From the ⋯ menu → Edit Rule opens Edit Detection Rule with five blocks.
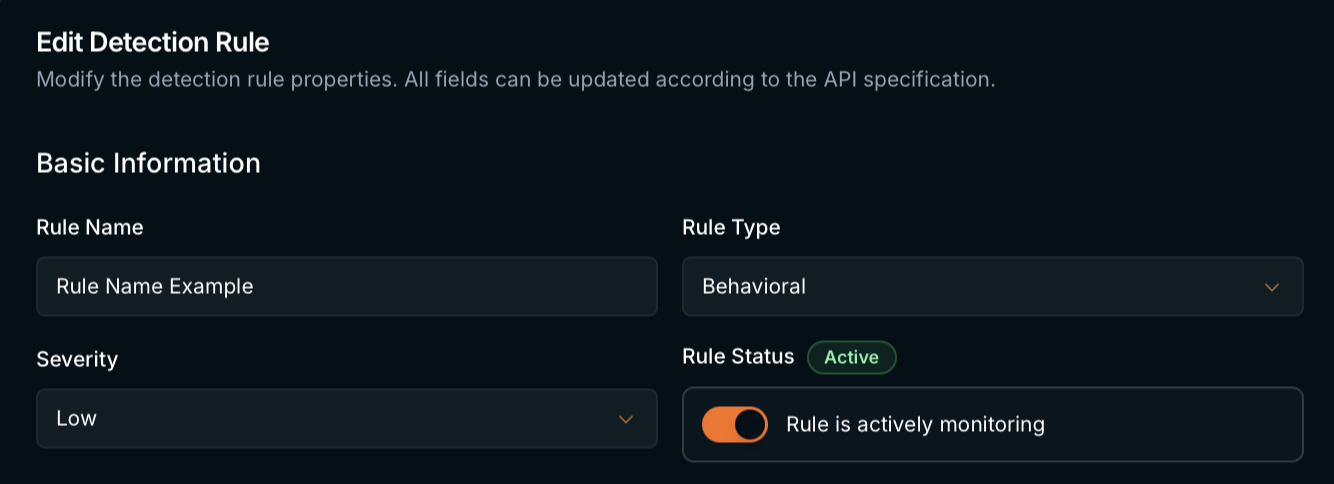
Edit · Basic Information
- Rule Name, Rule Type, Severity, and Rule Status (Active/Inactive).
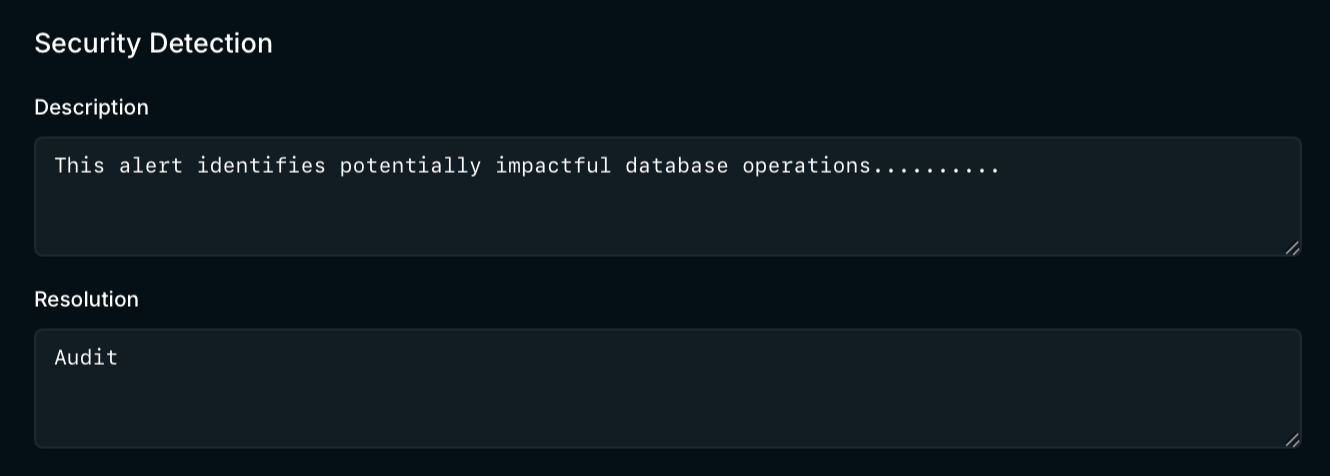
Edit · Security Detection
- Description and Resolution.
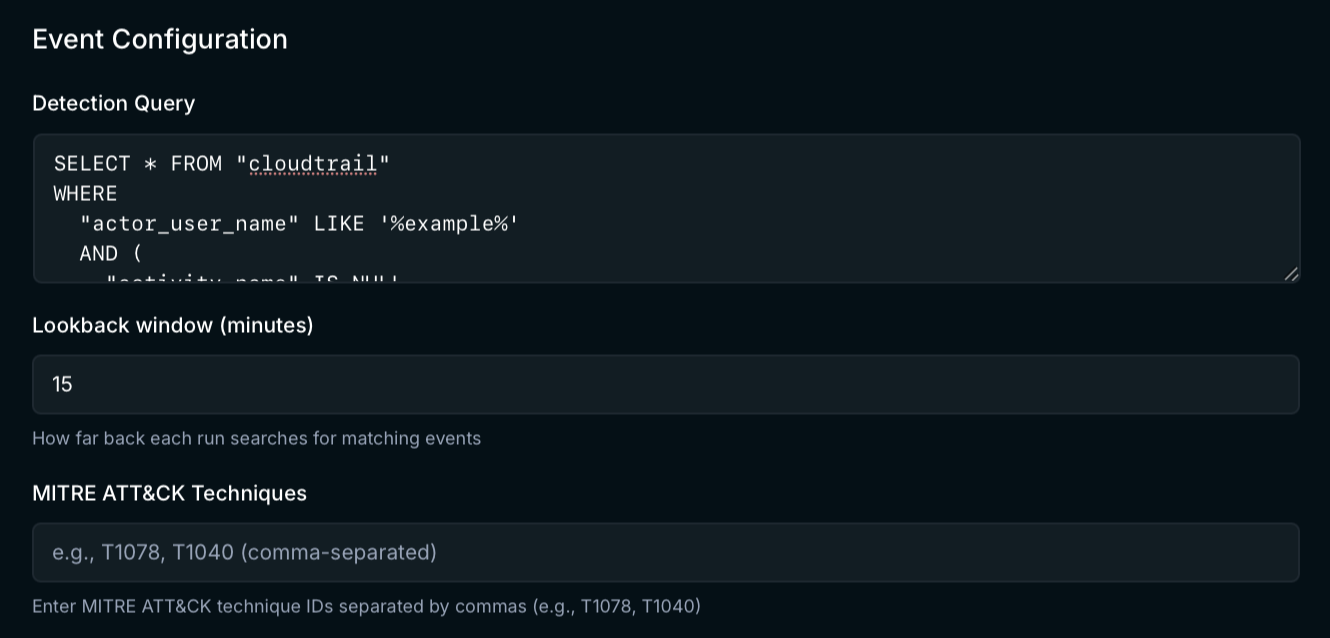
Edit · Event Configuration
- Detection Query, Lookback window (minutes), and MITRE ATT&CK Techniques (comma-separated IDs, e.g.
T1078, T1040). - The query must follow the same save rules:
SELECT … FROM … WHERE …withoutORDER BY,LIMIT,OFFSET,GROUP BY, orHAVING.
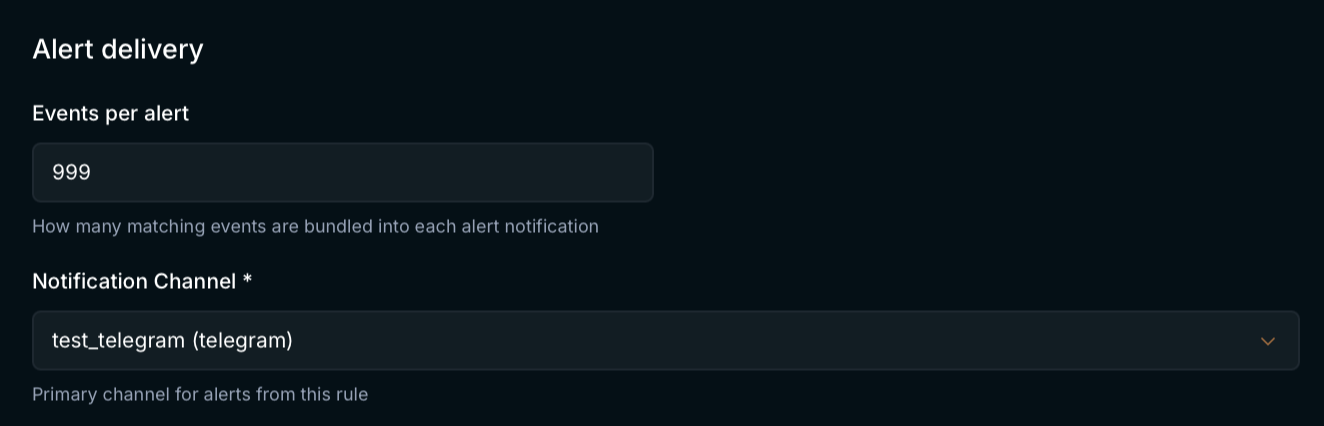
Edit · Alert delivery
- Events per alert — how many matching events are bundled into each alert. Default
1; at least1. - Notification Channel — fallback channel for this rule's alerts. Optional; recommended if you have no routing rules in Notification Rules. See Notifications.
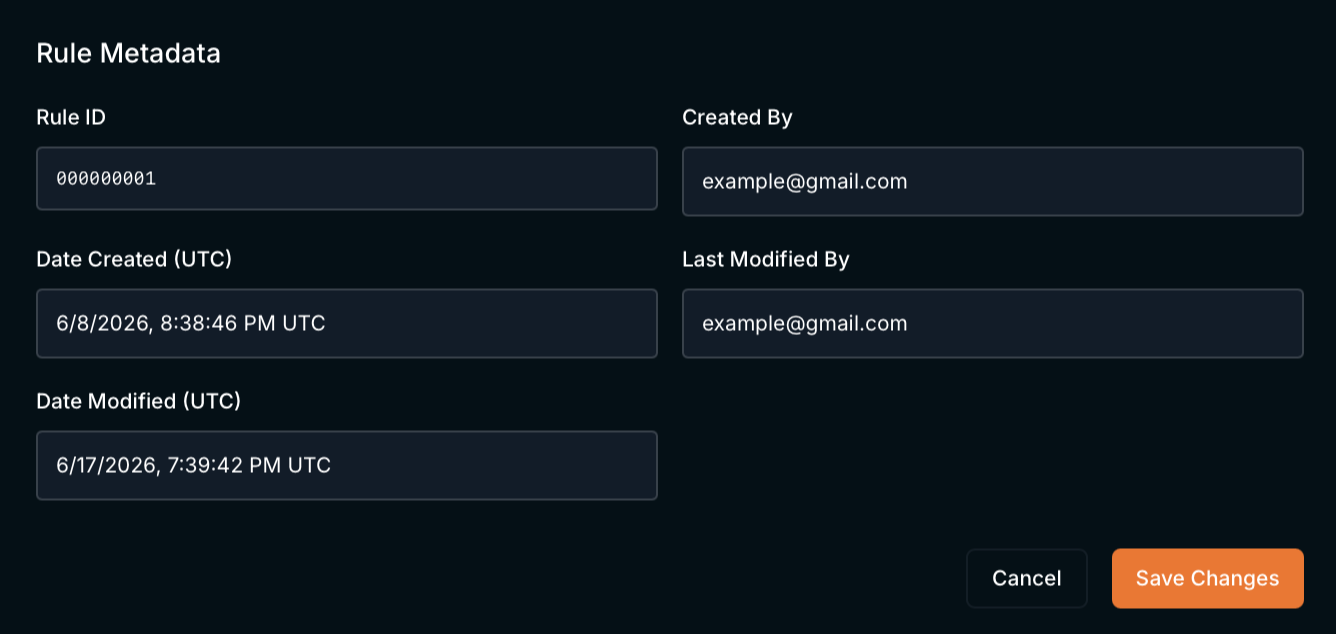
Edit · Rule Metadata
- Read-only: Rule ID, Created By, Date Created (UTC), Last Modified By, Date Modified (UTC). Finish with Save Changes.